I really enjoy picking fruit. I mean, what could be better than being out in the sunshine picking fresh beautiful berries and bringing it home to make yummy stuff like pies and jams? So far this year, I've picked strawberries in June, and blueberries and raspberries in July. I drag my girls along with me, so I rarely pick for more than an hour.
A couple of weeks ago, my dad and sister went with us to pick raspberries. It's been a hot summer, so the berries we picked were some of the few left on the bushes. Here is step-by-step how I made raspberry jam:
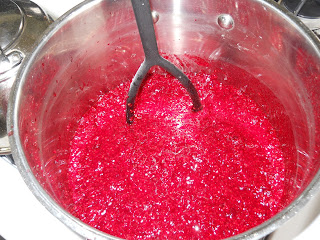
I washed the berries and put them in a pot to mash one cup at a time. Added pectin (I buy Certo boxes) and followed the directions on the box.
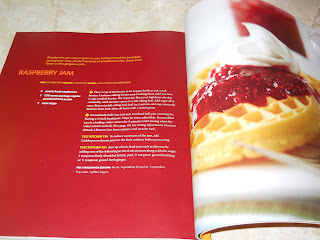
The recipe is the same on the box as it is in this You Can Can! book. Yes, I can can, can you?
I stirred the raspberry jam, while heating. Once it boiled, I added the sugar all at once. Make sure you have enough sugar on hand! This recipe took 6 cups! I often do double batches. You'll get diabetes just looking at 12 cups of sugar.
While your jam is "cooking," put some lids in hot water to keep warm and start your water bath canner boiling. Clean your jars. I often run my jars and rings in the dishwasher on sterilize and try to time it so that they are hot and ready at the right time. You could also just boil your clean jars in the canner.
Check on the kiddos. Yup, Clara is still sleeping.
Anna is watching cartoons...
Uh oh, Anna decided to come check out what mommy's doing. "Mommy doing?" Here, play with some alphabet fridge magnets. Later, I resort to throwing canning jar rings on the floor for her to play with. She likes to put them on her wrists and ankles.
Put your raspberry jam into the hot, sterilized jars. Fill to the right height on the jar, according to the recipe. Beautiful!
Get the lids out of the hot water to place on the jars. I use a magnet stick, which came in a canning kit. Oops, the end of it melted because it was resting against the hot canner. Make sure you don't do that!
Put the lids on and screw the bands tight, but no need to crank it. Put them in the canner and process 5 minutes, according to your recipe instructions. Make sure you time it from when the water begins to boil again.
Dishes to wash. But before you know it, the timer goes off and your jam is processed.
Remove jars and place on a wire rack. My favorite part is listening to the lids pop as they seal. It is so satisfying!
Clara is still sleeping. What a good baby!
With a little bit of work, you can put up plenty of jam for a year's worth of toast, waffles, and bagels. Eric especially loves homemade jam. He even gets pretty possessive over it, so I have to make extra for family and friends to give away (and sneak it to them). Strawberry and raspberry are his favorites, but I've made peach jam, too. Blueberries I'd rather just freeze and make pies and other desserts from. Oh what fun! Next time I'll post about making pickles. Stay tuned!


No comments:
Post a Comment